
Notes:
Upload this file first to ensure all senders are registered in CFT. This file contains the names and email addresses of the survey senders. It can be uploaded multiple times if updates are needed.
Order of Upload
-
Users – Upload first to ensure senders are in CFT.
-
Contacts – Upload second to add survey recipients.
-
Projects – Upload third to define project details.
-
Batch File – Upload last to launch the survey. Upload only once to avoid duplicates.
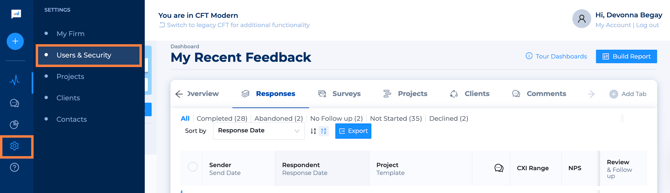
- From the modern dashboard, use the left-hand navigation panel to select Settings, then click Users & Security to open the management window. This will take you to the legacy side of the tool.
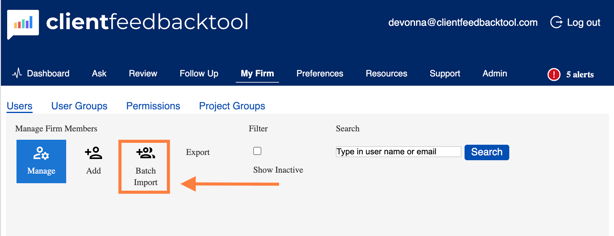
- Under the Users & Security management window, select Batch Import.
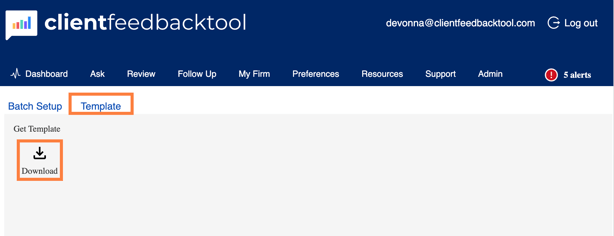
- Next, download the User Import Template file
- Select Template
- Select Download. This will download the User Import Template.
- Open the User Import Template file. You will want to enter data in the following required fields:
- First Name (Column A)
- Enter the Sender's First Name in this column
- Last Name (Column B)
- Enter the Sender's Last Name in this column
- Email (Column C)
- Enter the Sender's Email in this column
- Password (Column D)
- Create a password for each user using your firm’s acronym + Welcome + a number.
-
[FirmAcronym]Welcome001!
-
[FirmAcronym]Welcome002!
-
- Each user will have a unique login and be added to CFT. This will not change passwords for existing users.
- Create a password for each user using your firm’s acronym + Welcome + a number.
- First Name (Column A)
- After completing the first four columns, your User Batch file is ready to upload. You can now jump ahead to Step 8 for the upload instructions.
- (Optional) The User Import file also allows you to set additional user parameters, such as:
- Send on Behalf
- Respond on Behalf
- Assign new users to Project Groups
- Access API Data
- (Optional) The file will also allow assigning specific permissions to the newly created users:
- Firm Manager
- Firm Administrator
- Once you have entered user data, save the template, return to the User Management window in CFT, select Batch Setup, and then select Upload.

- In the Upload Batch Template pop-up window, click the Select File button. This will prompt you to select the User Import file that you created.

- Once the file has been uploaded successfully, click Read.

- This screen allows you to review the data before it is uploaded. Carefully check all data fields for accuracy.
- Review the Summary of User Import box in the lower right-hand corner to confirm the total number matches the number of users you intend to create/upload.

- When your review is complete, select Import to finish the upload process.

-
View Detailed Log (Optional):
After your file has been imported, you can click View Detailed Log to download an Excel file showing all processed records. The log will list which records were successful and which failed.