
- From your dashboard, navigate to the Users & Security management window which is located in CFT - Legacy.
-
- In the navigation panel, located on the left-hand side of the dashboard, select Settings, and then select Users & Security.
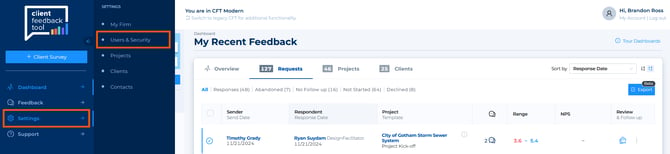
- In the navigation panel, located on the left-hand side of the dashboard, select Settings, and then select Users & Security.
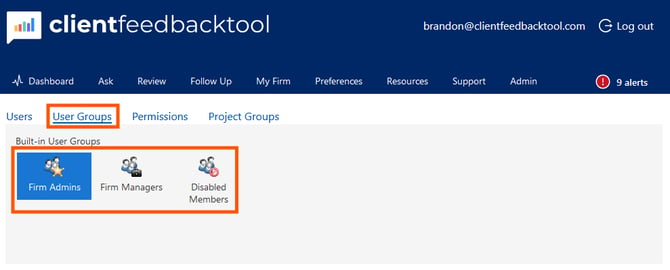
- In the header section, click your desired selection.
- User Groups
- Firm Managers - Firm managers are able to view, and follow-up to, all survey responses in the Client Feedback Tool.
- Firm Admin - Firm Administrators are responsible for the firm structure and customization within the Client Feedback Tool. They can invite or import users, set up the firm branding and default settings, and manage the survey templates. Note: You cannot remove your own Firm Administrator (FA) privilege. You must ask another FA to remove your privilege.
- Disabled Members - Disabled members are users who no longer have access to the Client Feedback Tool. They are not able to log in or send surveys, and do not receive any alerts or reports. However, their existing data is still visible. Note: As a Firm Administrator, you cannot disable yourself.
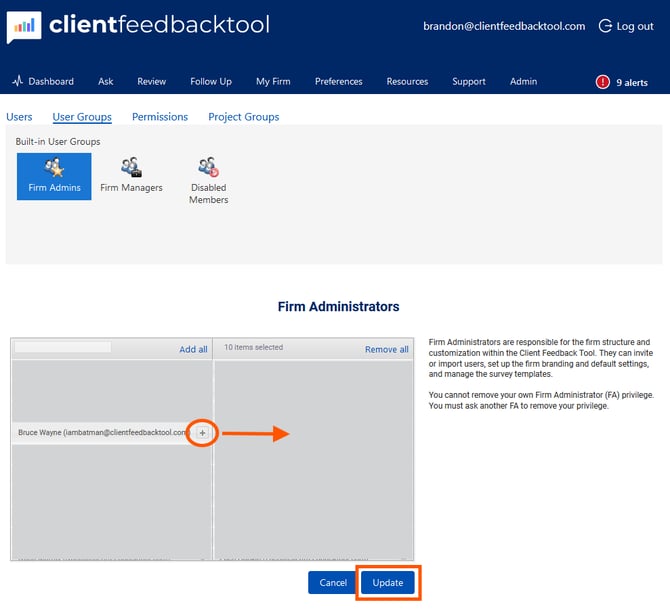
- For any of the User Groups above, identify the user for which you would like to update their User Group status. Select the "+" symbol next to their name / email address. This will place their record into the right-hand column. Once complete, select Update.
- To remove them from any group, you would find their name within the right column and move them back to the left. Once complete, select Update.
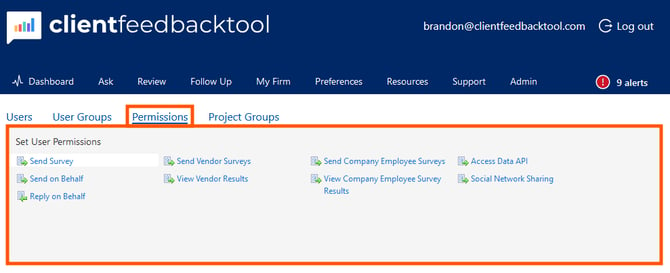
- Permissions
- Send Survey - Users that have permission to Send Surveys are able to send a survey that they are directly responsible for. They can also modify the survey, and will receive email notifications and see the responses.
- Send on Behalf - Users that have permission to Send On Behalf of another user are able to send a survey that another user is ultimately responsible for. The sender of record is the one who can modify the survey, and who will receive the email notifications and see the responses.
- Reply on Behalf - Users that have permission to Reply On Behalf of a client can enter responses to a survey as if those answers came directly from the client. This might be necessary for a client who either doesn't have access to email, or prefers to give details over the phone, while still allowing you to capture their data in the Client Feedback Tool.
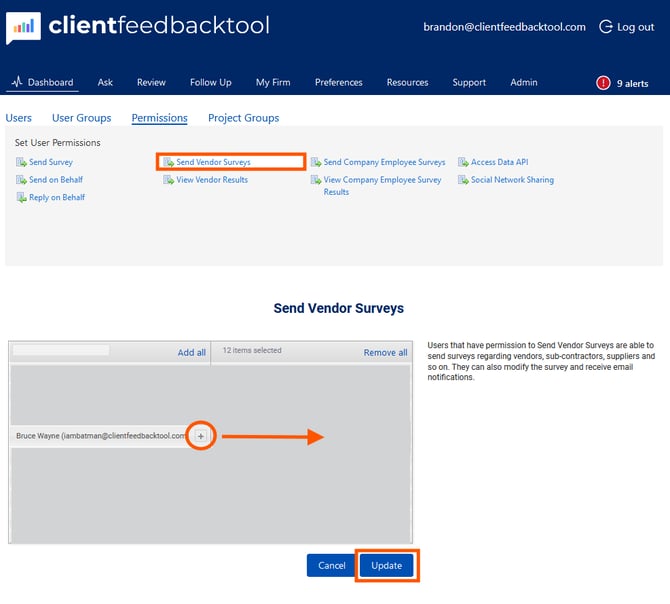
- Send Vendor Surveys - Users that have permission to Send Vendor Surveys are able to send surveys regarding vendors, sub-contractors, suppliers and so on. They can also modify the survey and receive email notifications.
- View Vendor Results - Users who have permission to View Vendor Results can view survey results regarding vendors, sub-contractors, suppliers and so on. A Vendor Survey sender must have this permission if he is to view the results of a Vendor Survey he sent. Others you might consider granting this permission: Firm Managers, Administrators, Project Group Managers, etc.
- Send Company Employee Surveys - Users with this permission can send company-wide employee surveys.
- View Company Employee Surveys - Users with this permission can view company-wide employee survey results.
- Access Data API - Users that have permission to access the Data API (Application Program Interface) are able to extract raw data through the API as part of the Client Feedback Tool Enterprise Integration Kit (CFT EIK).
- Social Network Sharing - Users who have this permission are allowed to share feedback comments and scores on a social network such as Twitter. The user will see a "Tweet" icon next to comments in the answers reports. Clicking the icon will open the Twitter site in a separate window with the comment ready to post. To permit users to post survey response comments on Twitter, drag their names from the left panel on this screen to the right panel(or double-click it). To remove the permission, move a user's name to the left panel.
- For any of the Permissions above, identify the user for which you would like to update their permission status. Select the "+" symbol next to their name / email address. This will place their record into the right-hand column. Once complete, select Update.
- Project Groups
- Click here to review how to Create a Project Group.
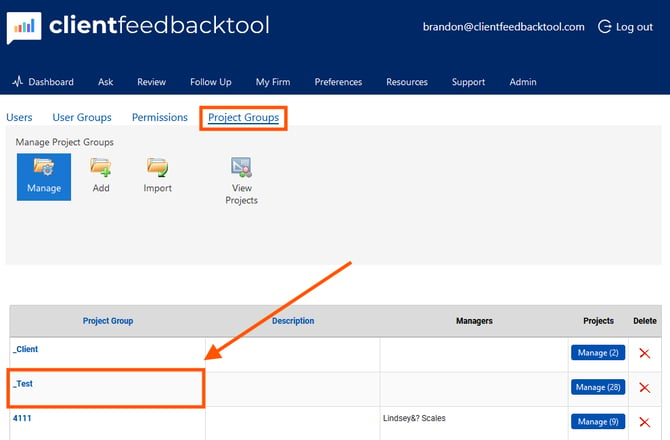
- To add a user to a Project Group, select the name of the Group.
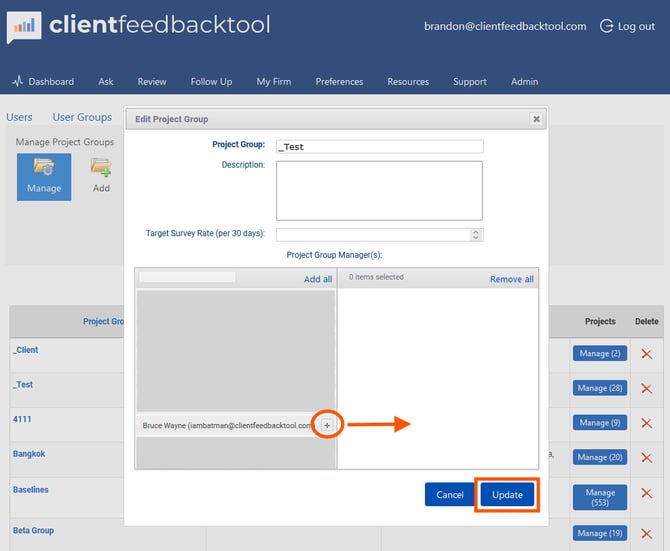
- When the Edit Project Group window opens, identify the user for which you would like to update their permission status. Select the "+" symbol next to their name / email address. This will place their record into the right-hand column. Once complete, select Update.
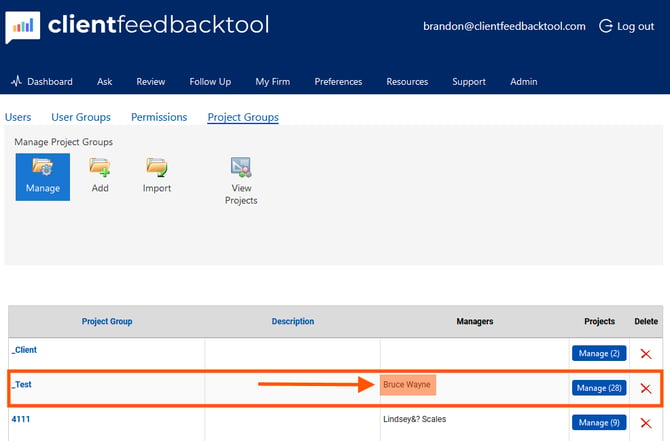
- To confirm process, the user should now appear under the "Managers" column.
- Finished.
- User Groups